Monday, August 6, 2012

Kitchen-Aid Mixer Makeover

Let me start this post by saying, I LOVE MY KITCHEN-AID MIXER!!!


It has got to be one of my very favorite kitchen appliances! My mother-in-law gave it to me a few years ago for Christmas, and now I don't know how I would live without it! I definitely wouldn't do as much baking as I do now! It makes whipping up some frosting super simple! I also love to use it for mixing dips that are made with cream cheese, as those are always hard to stir and make my arm feel like it is going to fall off!


I love that the mixers come in so many colors! I have the white one. I love it! It's so clean and goes with anything! But I have to admit even though I love mine, I have always lusted after the turquoise one!


One day I was at Walmart and saw this blue/glittery paint that I really liked.


After testing it on some paper, I really fell in love with it! Every time I looked at the paint all I could think of was how amazing a Kitchen-Aid mixer would look painted like that!


So one day I just decided I was going to do it...I was going to paint my mixer!


First, I put a layer of Mod Podge all over it, then I started painting. I had to put several coats of the blue paint on so you couldn't see the white through it. I think it ended up being about 3 or 4 coats. It took 3 bottles!


In this picture, you can see the streaks of paint and the white underneath on the base.


But after adding a few more coats it looks perfect!!! And the finished product...


I absolutely LOVE it!!! It turned out just as good as I pictured!!


Here is a close up so you can see the sparkle.


It especially looks good under the lights on my cabinets!


I am so happy with how it turned out! I used to put my mixer up when I wasn't using it, but now it has a permanent home on the counter! Every time I look at it I feel so proud!


So for less than $6 I got a new mixer!! ...ok, it's not really new, but now I have a new love for it!!


Friday, August 3, 2012

Locks of Love

I have been very blessed in my life. As a young child I was healthy and had two parents that loved me. I went to a good school and was provided for very well. As an adult, I am married to my best friend and have two wonderful children. I am very lucky to be able to stay home with my children and teach them and watch them grow everyday. I have had some hard times in my life, but overall I am very lucky!

There are many people in the world who are not so lucky. It's the little things in life that tend to make a big difference.

One day, many years ago, I heard about Locks of Love. They use hair donated by people to make hair pieces for financially disadvantaged children that have had long-term hair loss from a medical diagnosis. I can't imagine being a little girl and losing all my hair. The thought makes me so sad. I can only imagine how I would feel...

I am fortunate that my hair grows extremely fast, so when I was pregnant with my son and taking prenatal vitamins, it grew crazy fast! I decided to let it grow and donate my hair to Locks of Love!

I donated again when I was pregnant with my daughter! And last week I donated for the third time!

Here is my before picture!


My hair had gotten extremely long!


And here is me after donating 11 inches!


Its very different! But I really like it!!


I am always trying to think of unique ways I can give to others. It makes me feel good. And to think that my hair can help make a little girl feel better and get a little more self-confidence makes me feel incredible!

I encourage you to think of a way to give to others. You might not be able to donate 11 inches of hair, but there are other ways to give! Just try it! If nothing else, it will make you feel good!!


Thursday, August 2, 2012

I'm Back!

Wow, I have been gone for a long time! I have had a lot going on lately and unfortunately my blog got pushed aside for a little while. Hopefully things will settle down now....yeah right, I have two kids! I'm pretty sure things won't settle down until they go off to college!

My hubby and I took a little bit of a vacation to Salt Lake City, Utah. One o f my best friends lives there and she just got married! We absolutely LOVED Salt Lake City! I was probably the most beautiful place I have ever been! Ever since we got back we have been joking about moving there!

At least I think we have been joking....

Here are a few pictures from our time on top of Snowbird Mountain.


My handsome hubby! I love this picture!


Here I am in amazement at God's splendor!


I was having issues with my new iPad and Blogger, but as they say, "there's an app for that!". So I now have an app and I can do my posts from my iPad, and not have to get my laptop out, which is nice!

I also have been busy cooking, baking and crafting. I have so much to show you, and I promise I will keep this blog up to date now!


Sunday, May 20, 2012

Tip for Lettuce

I enjoy being in the kitchen for short periods of time.  I love cooking, but I don't cook too many things that take a long time to fix.  My goal in the kitchen is to do come up with as many short cuts as possible!  

One thing I like is salads, but I don't want to have to chop the lettuce every time I want one.  I could buy the already chopped lettuce in the bags, but then I would be paying for someone else to chop my lettuce!  I can do it myself!!

I showed this to my husband and he thought I was a genius!  I didn't come up with this, I saw it somewhere a long time ago, and have done it ever since.  


Take your head of lettuce in both hands with the stem laying flat on the counter.  Then pick it up and SLAM it down on counter!  Make sure the stem hits the counter pretty flat.  I usually slam it a couple of times. 

Then you grab the stem and pull it out.  That's it!  


You will have a neat little hole in the lettuce.


It just takes the core out of the lettuce.  Now you can chop all the lettuce and not have to worry about cutting around the core!


Now it's easy to grab to make a salad, or put on sandwiches, or whatever else you want it for!

Try this out!  If nothing else, it's a great way to get out a little frustration!  


Thursday, May 17, 2012

Frosting a Cake

I have frosted a lot of cakes!  One thing that drives me crazy is when I am frosting the bottom layer and I get the frosting all over the cake board.  When I finish, I try to wipe the excess off the board, but you can't get close enough to the cake and not mess up the icing that's already on the cake.  It's so frustrating!

So I came up with this idea and I LOVE it!  It works magically!

Get your cake board ready for the cake.  If you need to cover it, then do that first.


Get 4 or 5 thin pieces of wax paper (about 3 inches wide).  Lay them around edges of the cake board.  You want the paper to be covering where the edges of the cake will go, but not too far under the cake.  

Put a small amount of icing in the center of the cake board so the cake will stick.


Then lay your cake on the cake board. 


  Frost as you normally would. 


When you finish, all you do is GENTLY slide the wax paper out from under the cake.  I usually grab one corner and pull it out in a circular motion toward the other corner.  (Does that make sense?)  I don't pull it straight out because some of the icing on the cake tries to come too.  But if you do it at an angle, and slowly, it's not a problem. 

Now you should have a perfectly iced cake and a clean cake board! 

I hope this helps!  


Tuesday, May 15, 2012

Bridal Shower

Baby showers, wedding showers, birthday parties..they are all a lot of work!  But I really enjoy doing them for people I love!  

This past weekend I had a bridal shower for one of my best friends.  She is currently living in Utah and I miss her so much!  But she really is a great friend and I was honored and more than happy to have a shower for her!  Some of her family and friends helped too...thank goodness!  I had a lot planned and greatly appreciated the help!!  

Instead of doing a theme for the shower, I decided to just use the colors that she is going to use for the wedding.  Purple and grey!

Here is the food table.  I think it looked really nice!!


These are some napkins that I found at Walmart.  They stand up!  I thought they were so cute and the fact they stood up just made them even cuter!!


Pasta salad...I make this for parties a lot.  It's always a big hit and SUPER simple to make! 


Cucumber bites.  I love the way these look!  So impressive...I won't tell how easy it really is!! 
 (Not yet, anyway!) 


I'm not really sure what to call these...They are grapes and cheese cheese balls on a toothpick.  I have a wonderful recipe for a cheese ball that is rolled in chopped pecans, so I just made little balls instead of one big one and stuck a grape on the end!  They were a big hit!  Everyone was very impressed with them!


Here is a close up picture.  Yummy!


Greek yogurt, granola, and fruit parfaits.


Now for the sweets...

Chocolate dipped pretzel rods.  

I just love these!  They are so pretty!  And I love how they are arranged in this cake platter!


There are purple with white chocolate drizzled on them, and white ones with purple drizzled.


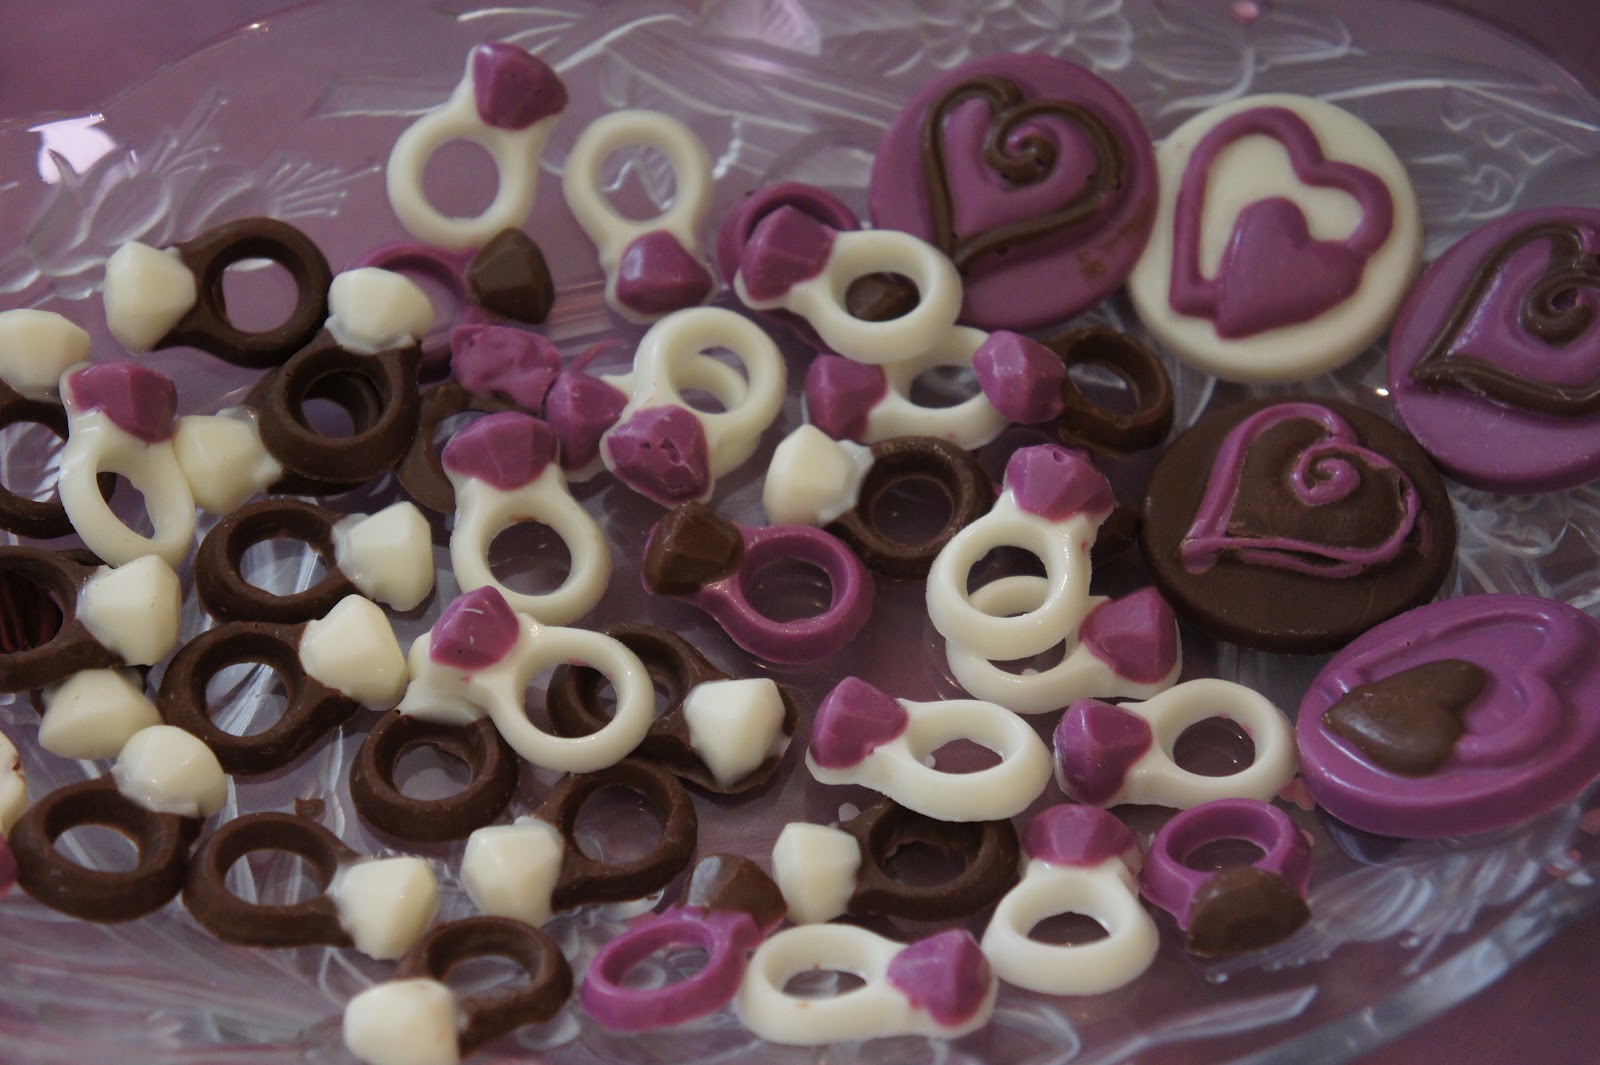
I found these cute diamond ring chocolate molds at Hobby Lobby!  I love them!  They were prefect for this occasion of course!


Here is the cake I made.


That is not ribbon, it's edible sugar!  This was the first time I used that and I LOVED it!!  I will definitely use it again!!


It was a white cake with white buttercream and fresh sliced strawberries in the middle.  This is probably my favorite kind of cake to make!


I also made some chocolate heart lollipops.


We had some purple and gray M&M's too!


These are sugar-dipped marshmallows.  I had never done this before, but I love the way they turned out! 


The Bride's Aunt got this champagne that was so good!  It was Barefoot pink champagne.  You should definitely try it if you get the chance!


I got these heart shaped ice tray molds from IKEA.  I love the heart ice!!


I also did these water bottles. 


It's just duct tape, ribbon and packing tape!  


I think they turned out SO cute!!


For a bridal shower, I thought it was fitting to have ring pops!


My hubby and I made this picture for the bride and groom to hang in their new house of their last name!  I love the way this turned out!


The shower turned out beautiful!  I have to thank the Bride's Aunt.  Karry, thank you for letting us use your beautiful house! 

Carolyn and Brett, thank you too!  I couldn't have done this without you two!!  

Courtney, I hope you had a wonderful shower!  I love you and am so happy for you and Jon!  I can't wait until July!!


Friday, April 27, 2012

Diet Cake

I know, the title of this post is confusing!  The words "diet" and "cake" don't usually go in the same sentence...unless you say, "I want a piece of cake, but I'm on this stupid diet!"  Then they totally go together!  

But now you can be on a diet AND have cake!!!  And it's super simple!!  

It only takes 2 ingredients!!  

I used Funfetti cake and Diet Cherry 7-Up.


You can use one can of soda or you can use 8 oz, if you bought more than you actually needed, like I did! 


Now are you ready for the easiest cake EVER???  

Pour cake mix into a bowl.


Slowly pour soda in with cake mix.  (Slowly so you don't get too much fizz!)


Mix together.


Pour in cake pan or cupcake pan.

Easy so far, right?  Are you still with me?? 


Bake at 350 for 25 minutes or until a toothpick inserted in the center comes out clean.


The cake doesn't get too brown.


You can top it with some Cool Whip and you have a low fat, low calorie dessert that tastes fabulous!


It is super-moist!!!  

I totally killed the "diet" part of this cake with my topping!!  I had some buttercream left over from the volleyball cupcakes  that I made a few days before.  But I topped it with fresh sliced strawberries, so that makes it better, right?!!


No matter what you top it with, it is a really delicious cake!  And the fact that it is so low in calories is a super bonus!!    

There are tons of other variations you can try too!  Chocolate cake and Diet Dr. Pepper is the next one I want to try!

This entire cake only has 1600 calories!!  So that means if you were to sit down and eat the ENTIRE thing, you would have less calories than eating an order of large fries and large Coke and either a Whopper, or Big Mac, or Wendy's Double with Cheese!!  Wow!!  And seriously, who is going to sit down and eat an entire cake?  But if you do, don't feel so bad!!  

Enjoy!